Location Metafield
The Location Metafield in Shopify lets you display products based on location using the new storefront filter. This helps customers find exactly what they’re looking for more efficiently, improving their shopping experience.
With the Multi-Location Inventory app, you can create a metafield for each variant of every product in your Shopify store using the Tagging & Metafields feature.
Location metafields can now be used not only for filtering but also for creating location-based product collections. Using tags for location-based collections is no longer recommended by Shopify and is considered a legacy feature.
Step 1: Enable custom location metafield filtering
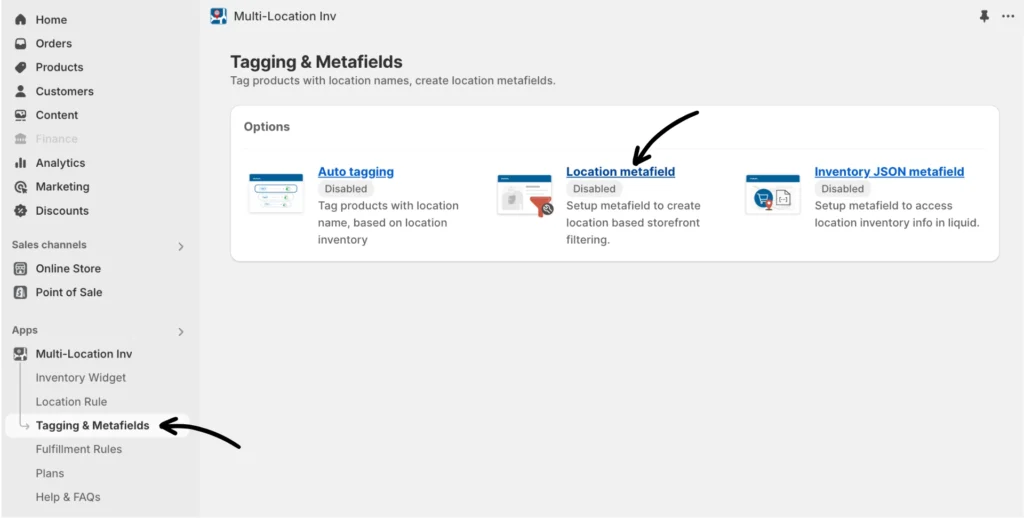
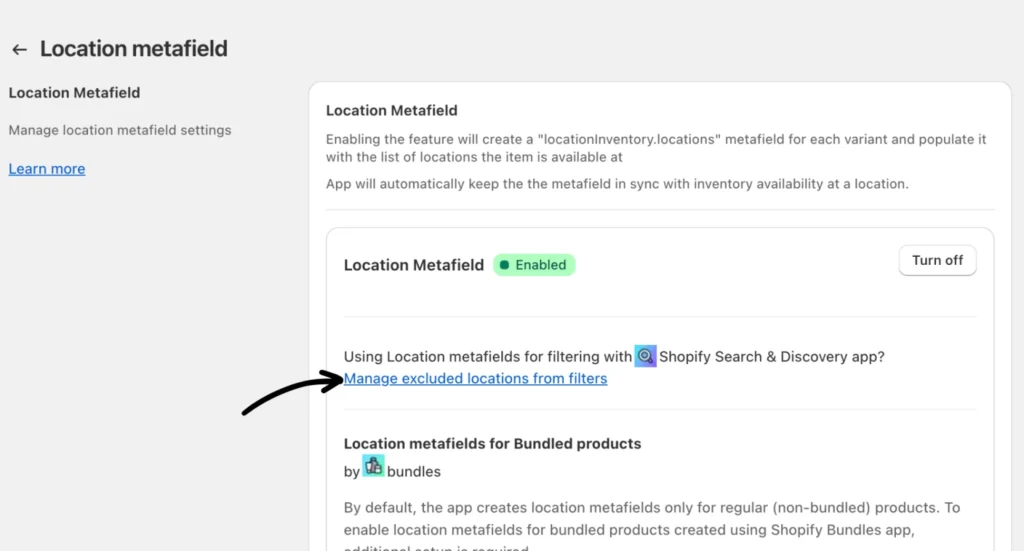
In the Multi-location Inventory Info app, navigate to Tagging & Metafields > Location Metafield.
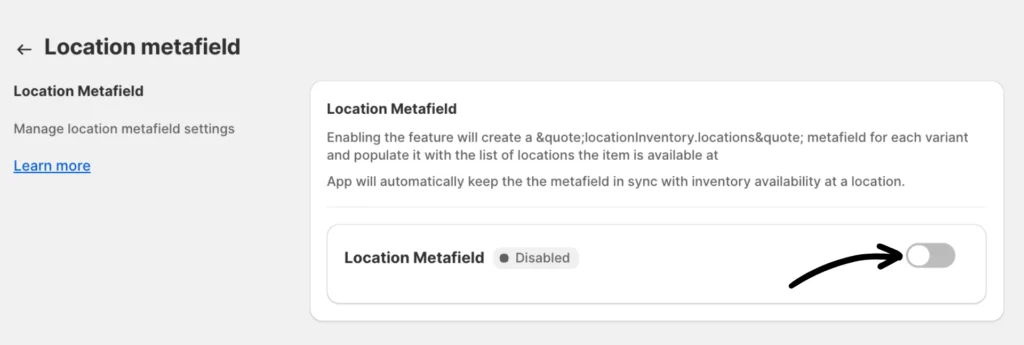
Then, toggle the bar to enable the Location Metafield option.
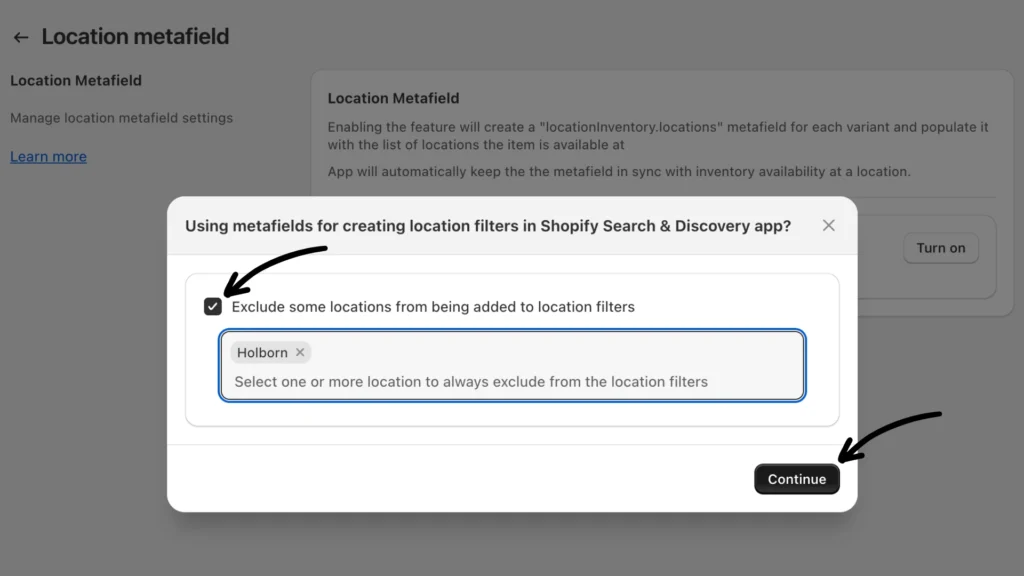
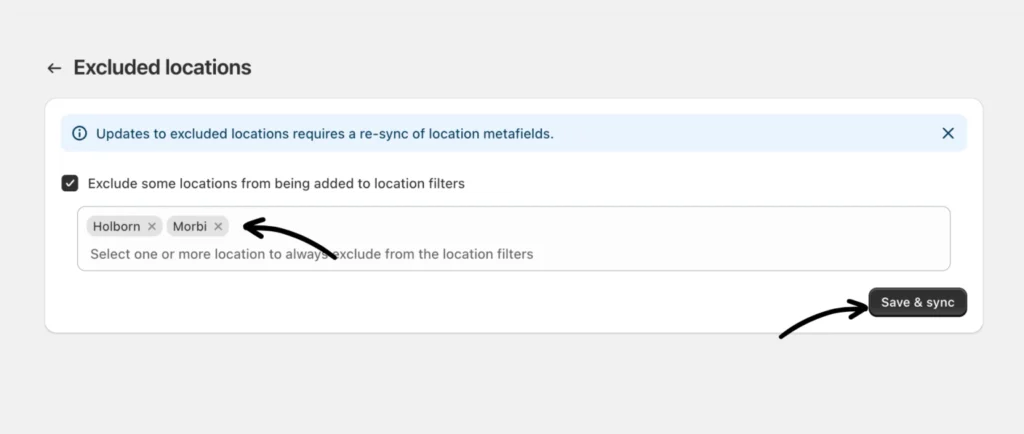
When you turn this feature on, a prompt will appear asking whether to exclude certain locations from the Shopify Search & Discovery filters. Check the box to select one or more locations, then click Continue.
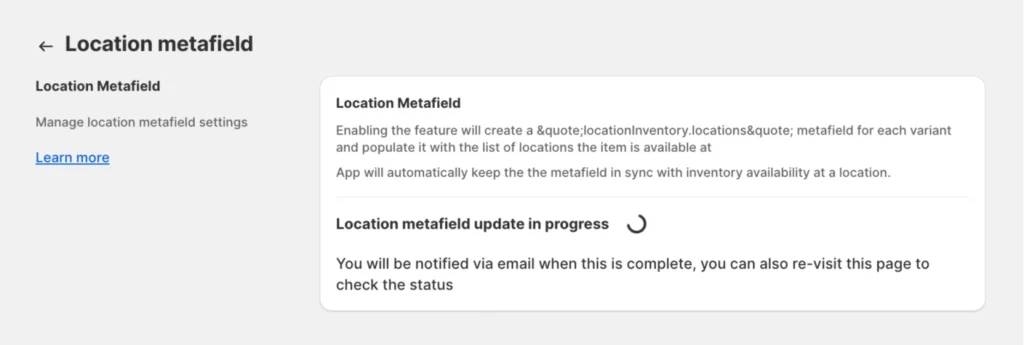
Once turned on, this will initiate an update process. For a status update, click the refresh button on your web browser.
Note: The initial tagging process is automatic and may take a few minutes to a few hours, depending upon the catalog size (i.e., number of products and variants). If the process has not finished within 24 hours, please contact our support team.
Once the sync is complete, scroll down to the product page on your Shopify Admin to find the newly created metafield section. See the demo below for your reference:
Manage excluded locations from filters
Suppose you already have the Location Metafield configured before. In that case, you can simply click on Manage excluded locations from filters to get to the excluded locations list.
From here, you can manage which locations are excluded from Shopify filters. Select one or more locations, then click Save & sync.
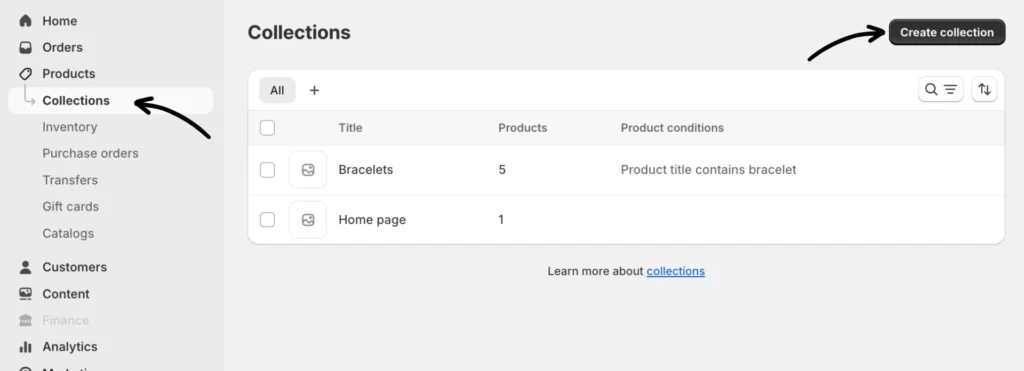
Step 2: Create location-based collections
Navigate to the Products section on your Shopify admin dashboard and create a collection of products you want to designate for a specific location. You can do that by clicking Products > Collections > Create collection.
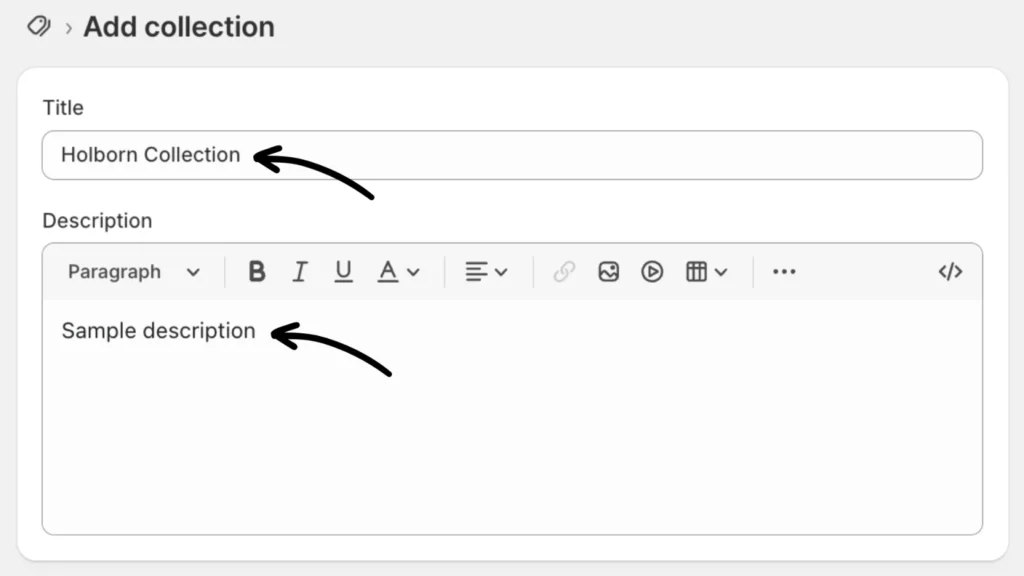
Give your collection a title and add a description
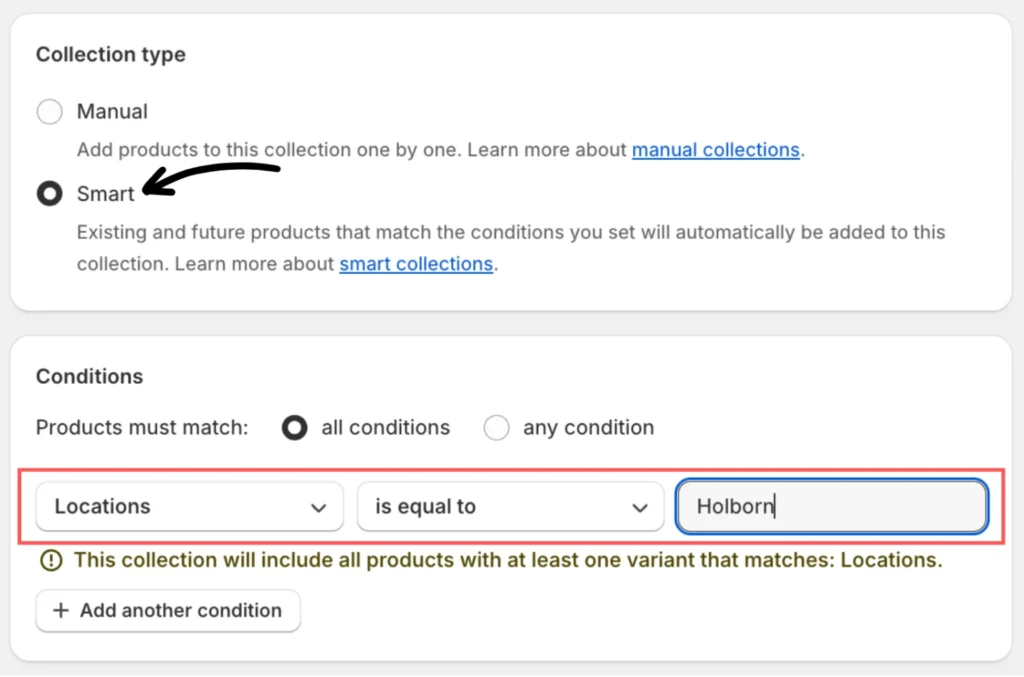
Next, select Smart as your Collection type. For the conditions, specify Locations > is equal to > enter the location name where these products are available (e.g., Holborn).
Make sure to click the Save button afterward.
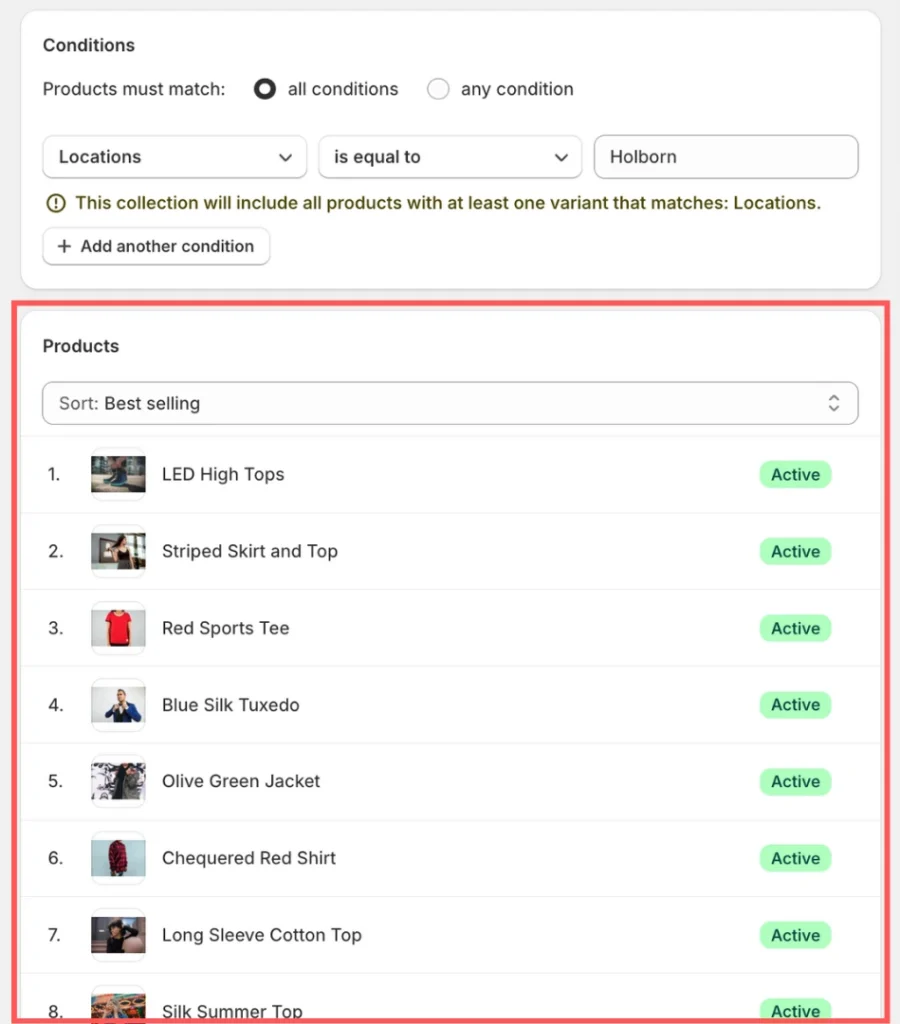
Products matching the condition(s) will populate shortly upon refreshing your browser. You can add more collections as needed.
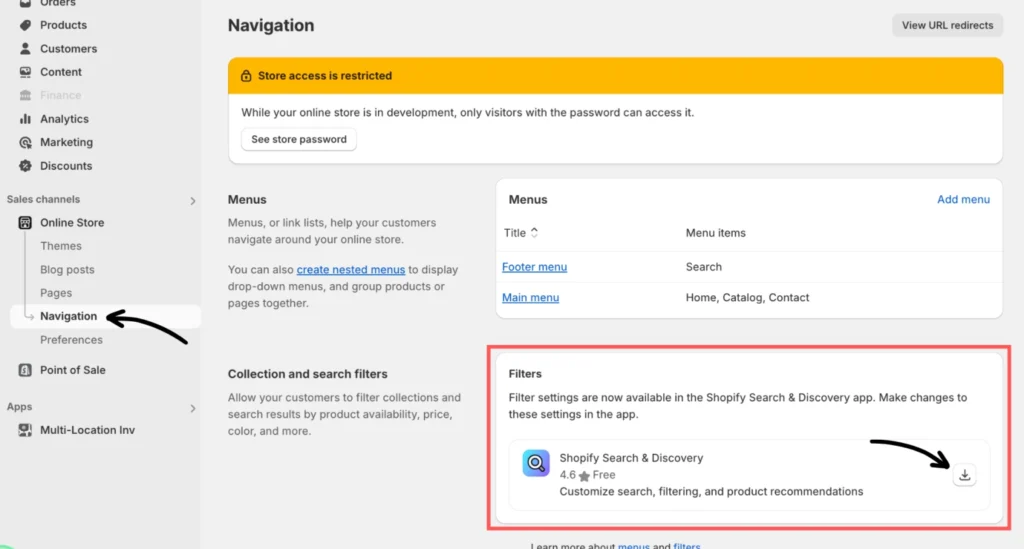
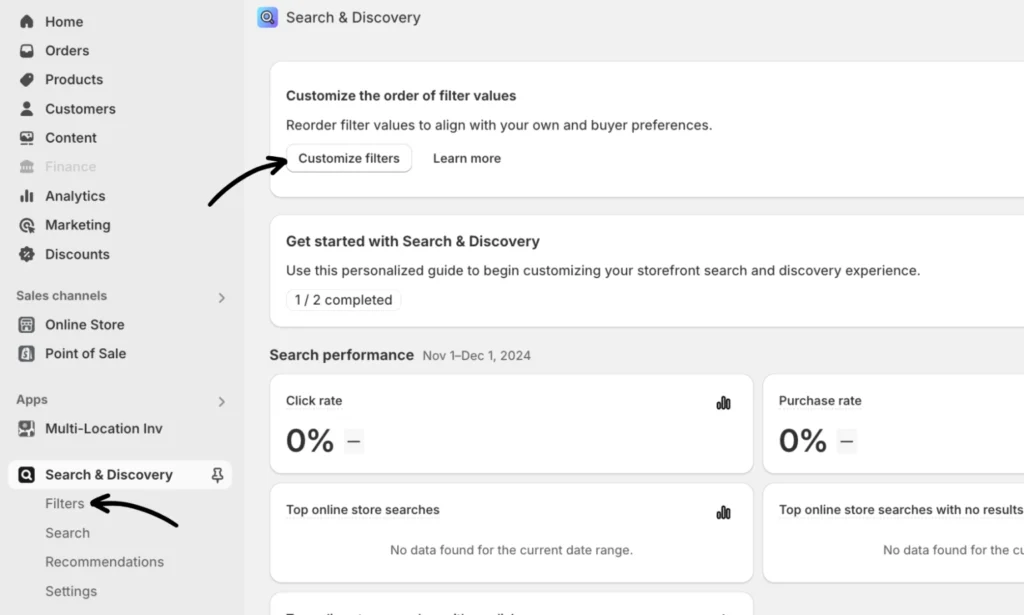
Step 3: Install Shopify Search and Discovery
Go to the Online Store and select Navigation. Scroll to “Collection and Search Filters” and click the button to install the Shopify Search & Discovery app.
Step 4: Add filters
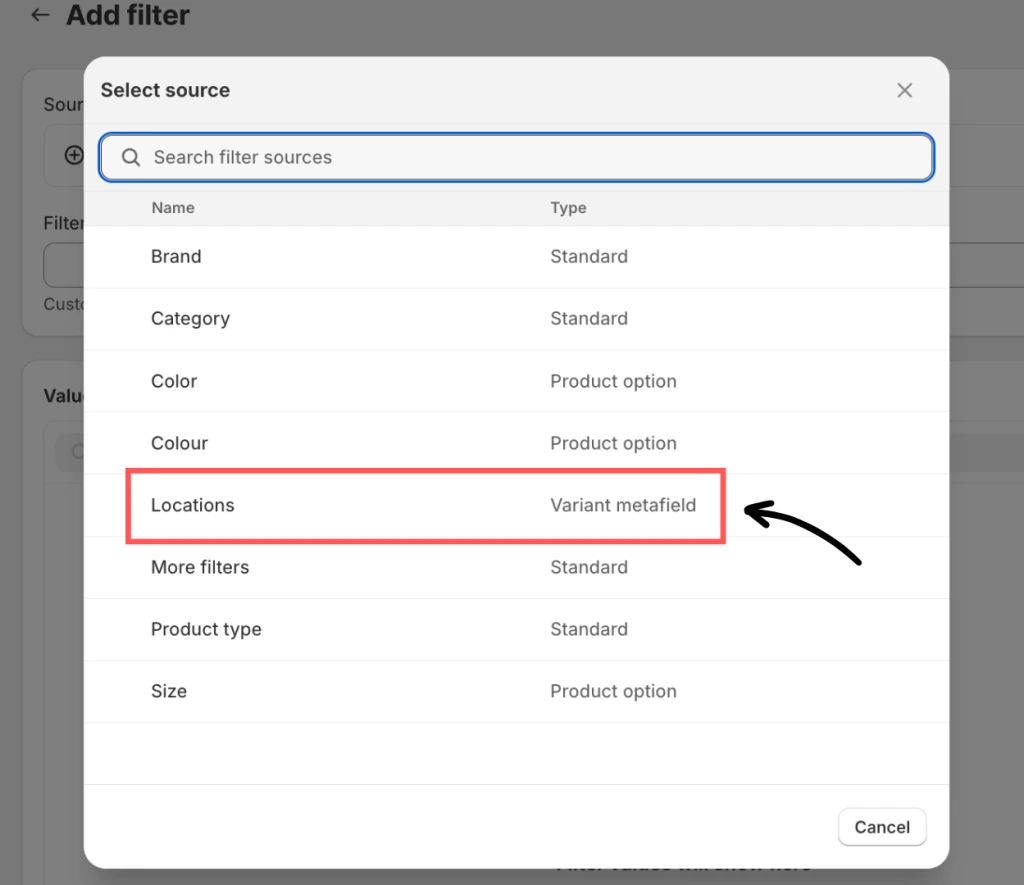
From the app, go to the Customize filters option and then click Add filter.
Click + Select source and choose Locations (Type: Variant metafield) from the list.
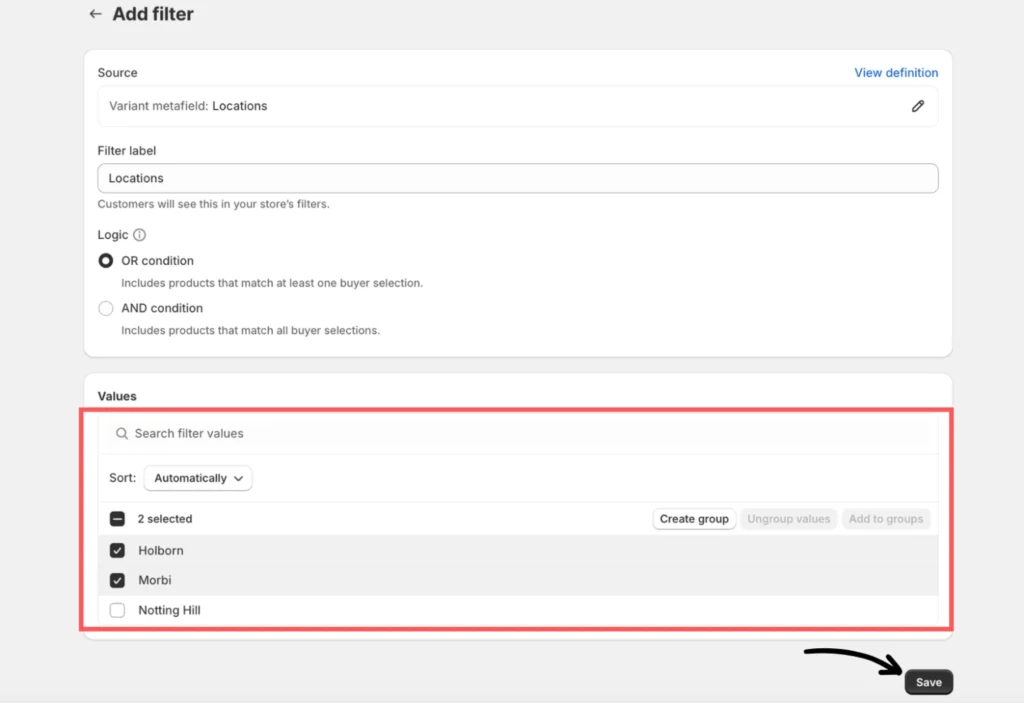
Configure your filter values and then hit Save.
Note: The app currently supports a maximum of 50 locations.
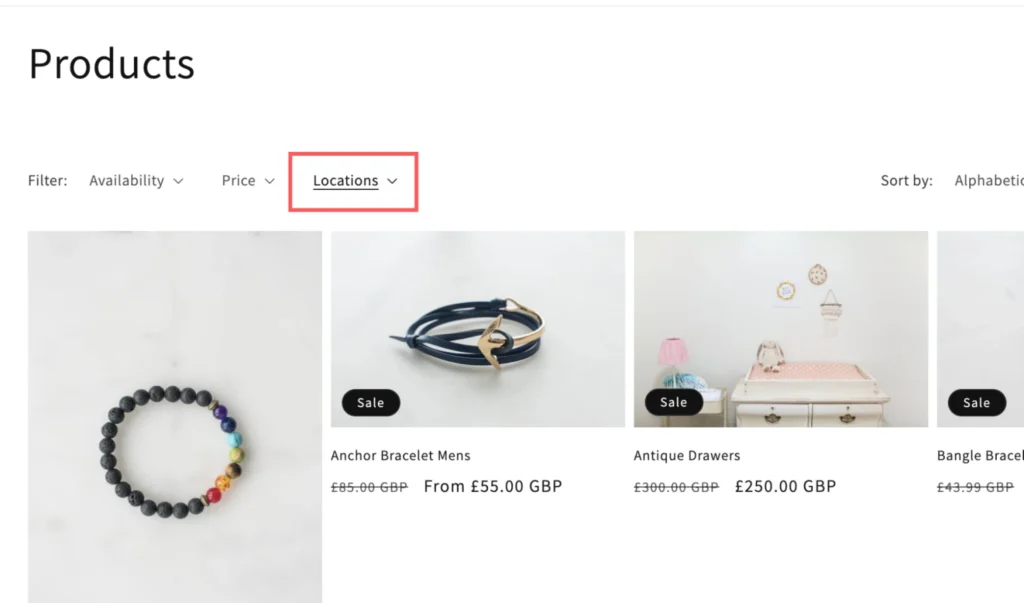
The preview will appear on the storefront as shown below:
If you need help, please feel free to contact our support team.