Location-based collections
The Product Auto Tagging feature tags products with available locations based on inventory. This allows automatic collection creation—filtering products by availability at specific locations. When enabled, all active products in the online sales channel will be tagged with the location(s) where they or their variants are available. The app ensures these tags remain synchronized with the inventory availability at each location, providing up-to-date filtering and organization of your product collections.
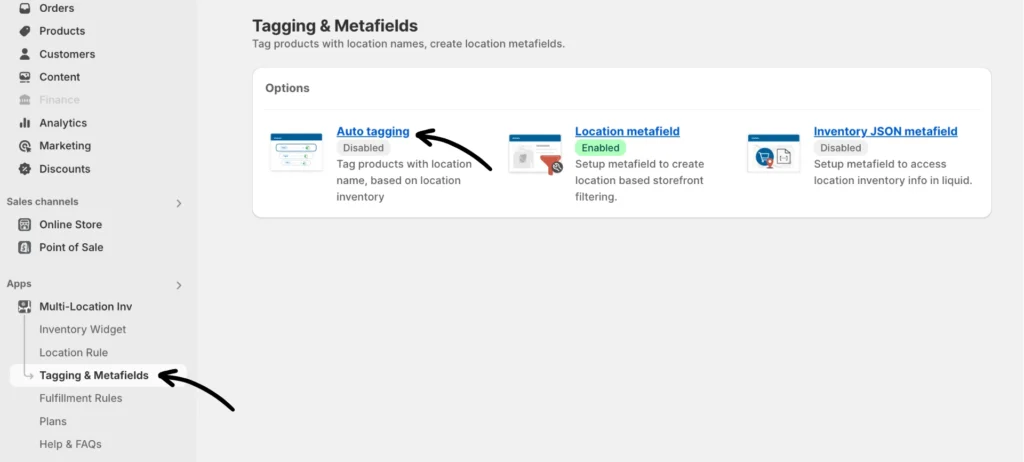
Set up Tag filtering
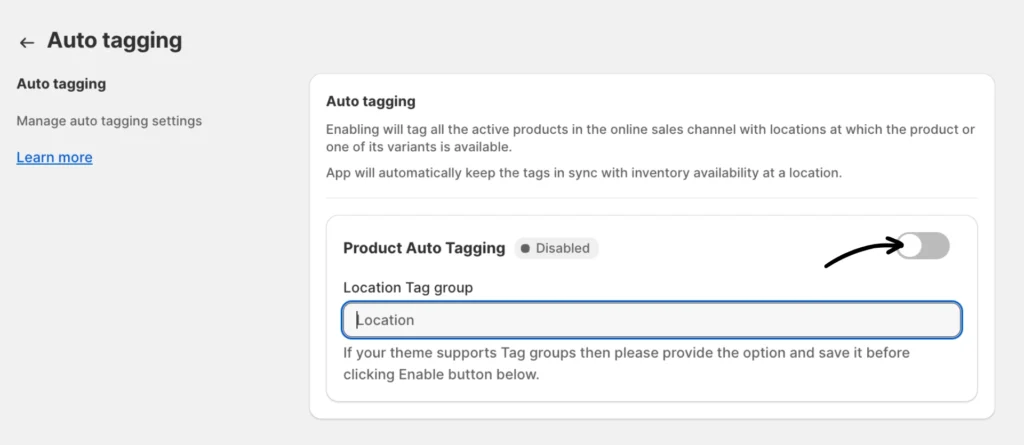
Step 1: Enable the Tag filtering feature (Auto Tagging) by going to Tagging & Metafields > Auto tagging from the app and toggling the Product Auto Tagging button.
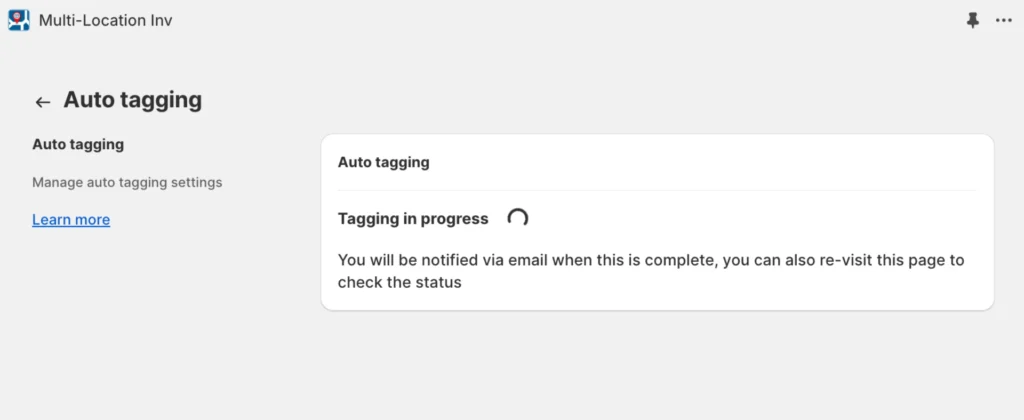
This will initiate an update process. Click the Refresh page button for a status update.
Please note that the initial tagging process is automatic and may take a few minutes to a few hours depending upon catalog size (i.e. number of products and variants). If the process has not finished within 24 hours, please contact our support team.
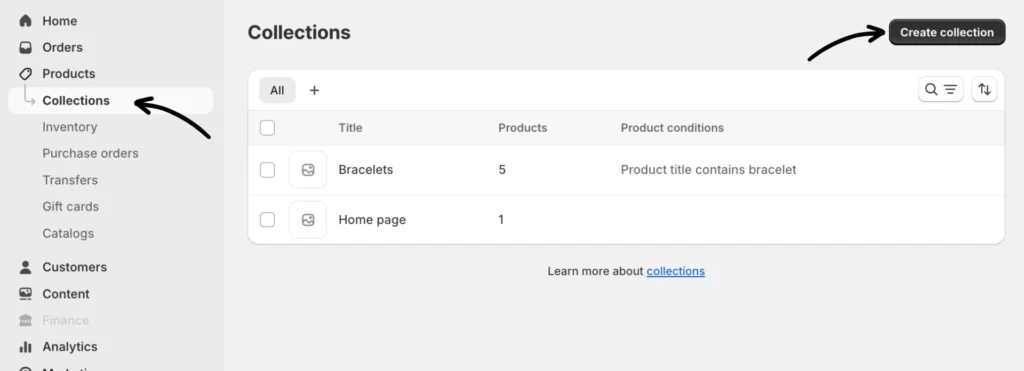
Step 2: After enabling Product Auto Tagging, navigate to the Products section on your Shopify admin dashboard and create a collection of products you want to designate for a specific location. You can do that by clicking Products > Collections > Create a collection.
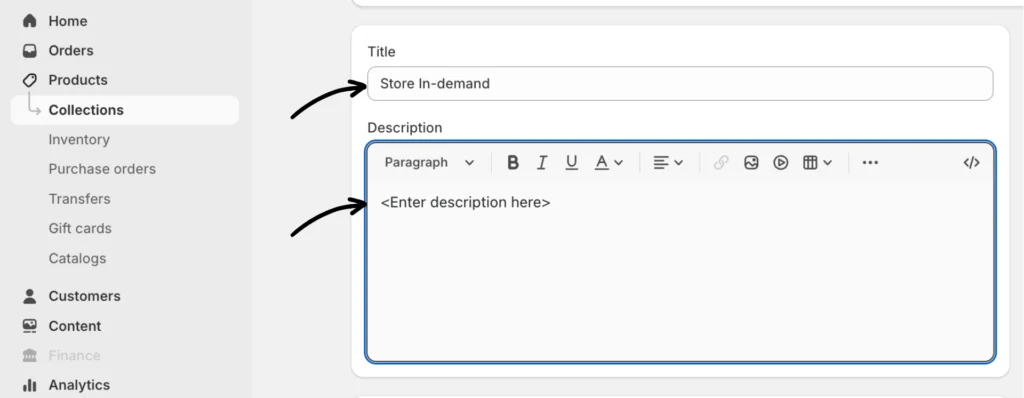
Give your collection a title and add a description.
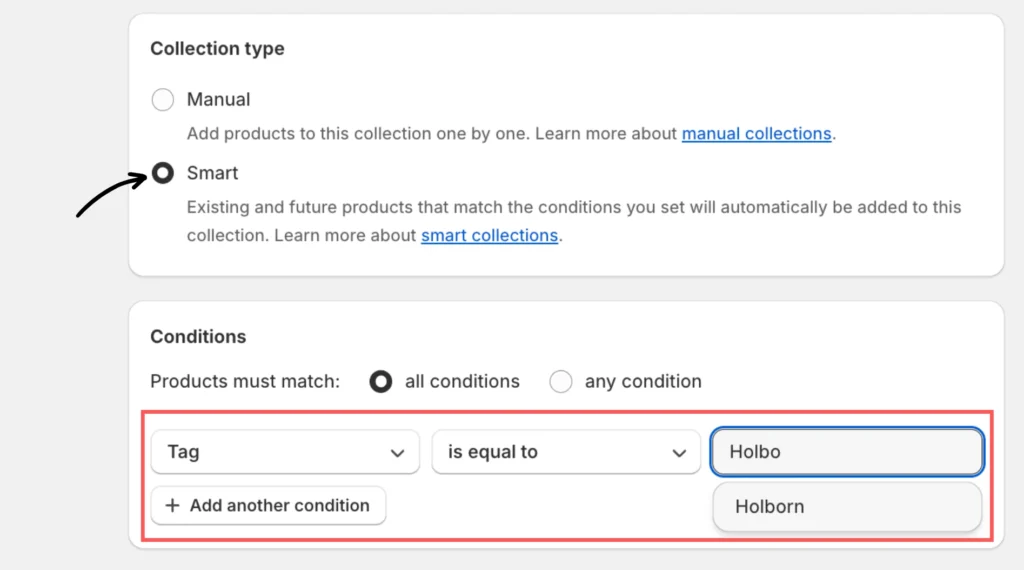
Next, set the Collection type to Smart. For the conditions, specify Product tag > is equal to and then enter the tag corresponding to the specific location where these products are available. Make sure to click the Save button afterward.
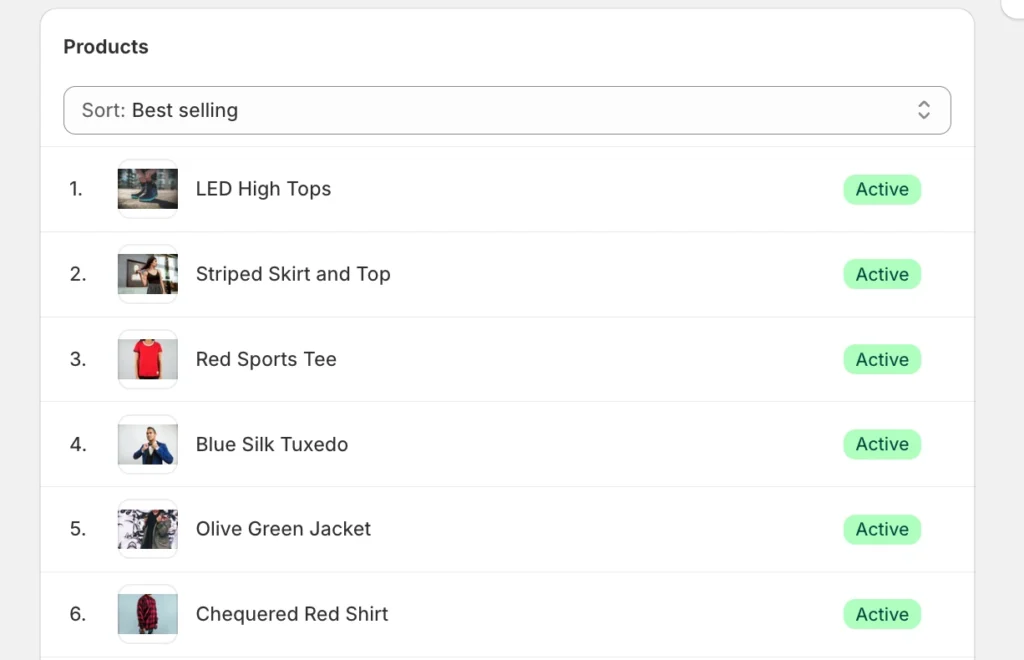
After creating the collection, it will automatically populate with active products tagged for that specific location.
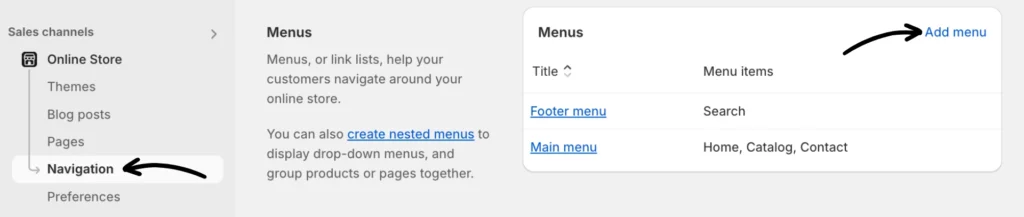
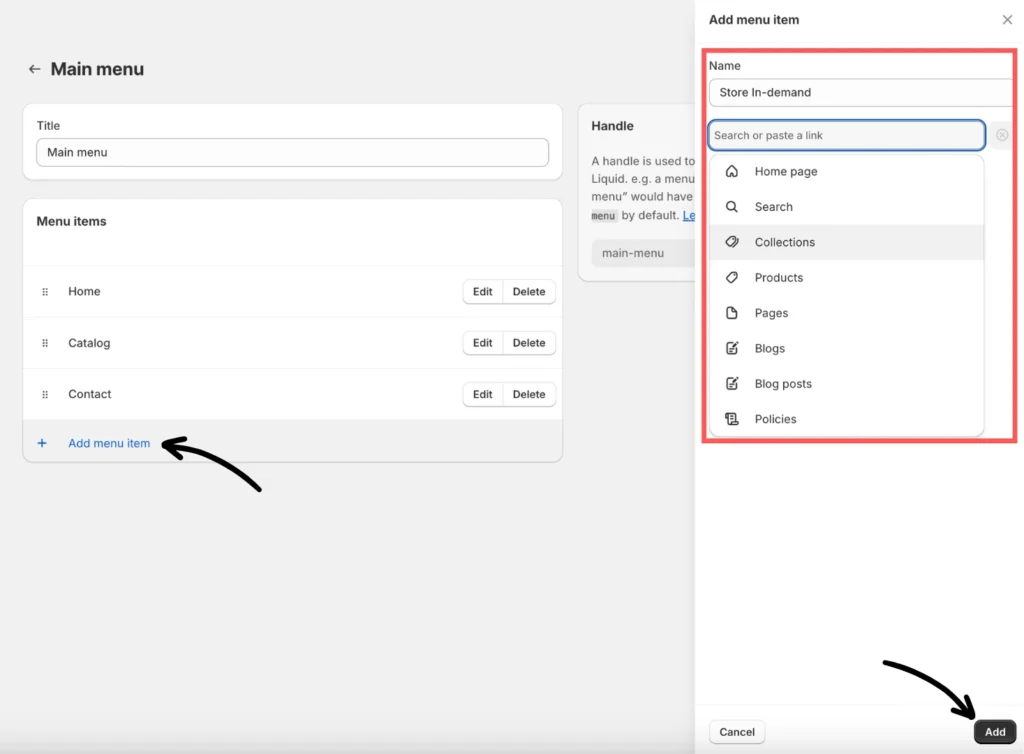
Step 3: Link locations collection. In your Shopify admin panel, go to Online Store > Navigation. Once you’re there, click Add menu or click from any available menus (e.g., Main menu).
Click + Add menu item, enter a name for it, search or paste a link (e.g., Collections > select a specific location from the list), and then click the Add button on the bottom part.
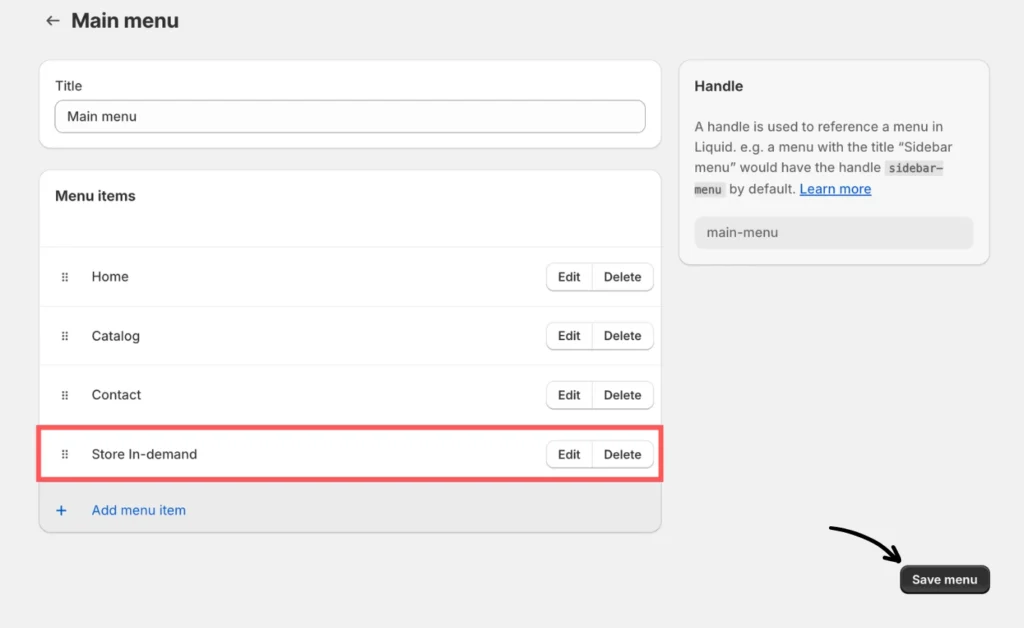
The menu item is now added. Once confirmed, add a title as needed and click the Save menu button to apply the changes.
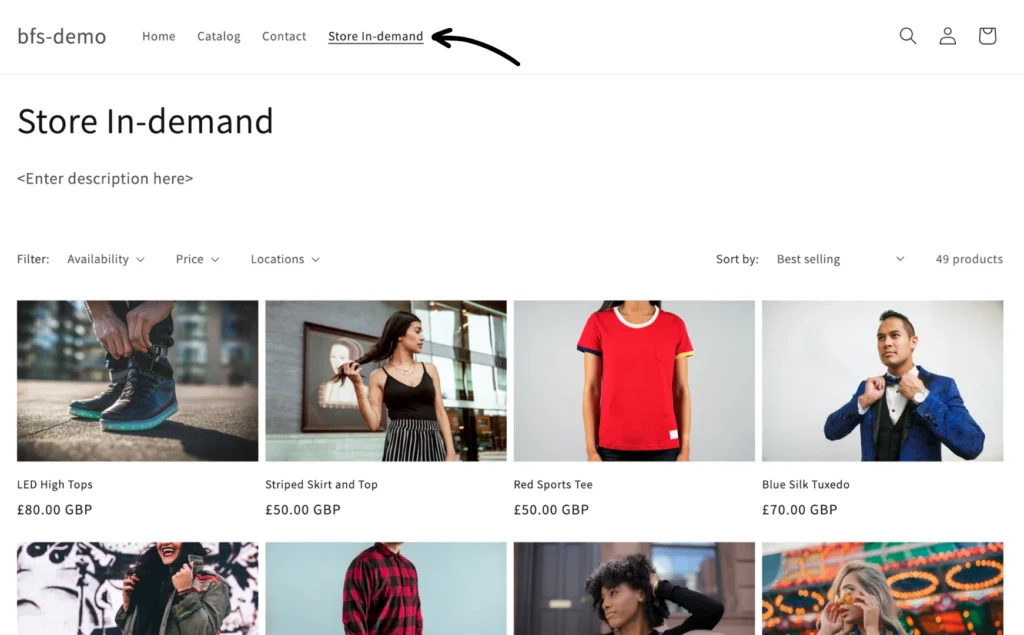
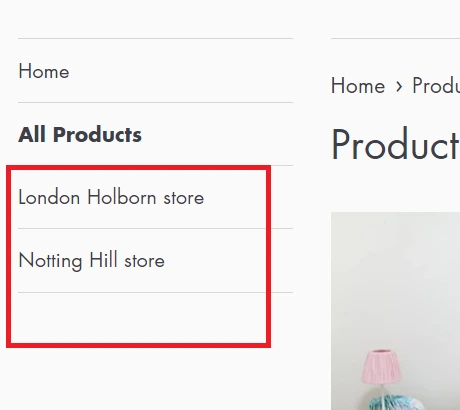
Storefront preview:
Important notes about the Auto-tagging feature
- Because the app uses a location name from Shopify’s location settings, you need to ensure you are happy with the Location name before enabling the feature. Once the feature is enabled and you want to change the Location name, you must disable the feature and wait for the app to remove the location tags before updating the Location names in Shopify.
- The app only tags active & published products available in the Online sales channel.
- The time it takes to disable the feature depends on how big or small your product catalog is.
- Once the feature is enabled, the App will automatically add or remove tags on a product whenever its stock quantity is changed within Shopify. Please note that there will be a 15 to 20-second delay between when the stock quantity changes in Shopify and when the app updates the product’s location tags.
- The app currently supports up to 50 locations.
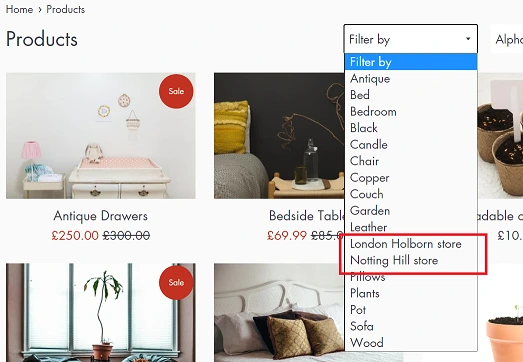
Themes with no Tag groups support
If your theme does not support tag groups then most likely your theme will have a “Filter by” dropdown option to allow for filtering by Tags and location tags will appear in the dropdown automatically OR you can manually create links in your navigation for Location-specific collection pages.
Themes with Tag groups support
If your theme supports tag groups, you can specify the name of the tag group in the Location Tag group field.
Here’s an example of a left-hand navigation with the Location tag group:
If you have questions, our app support team can always help.