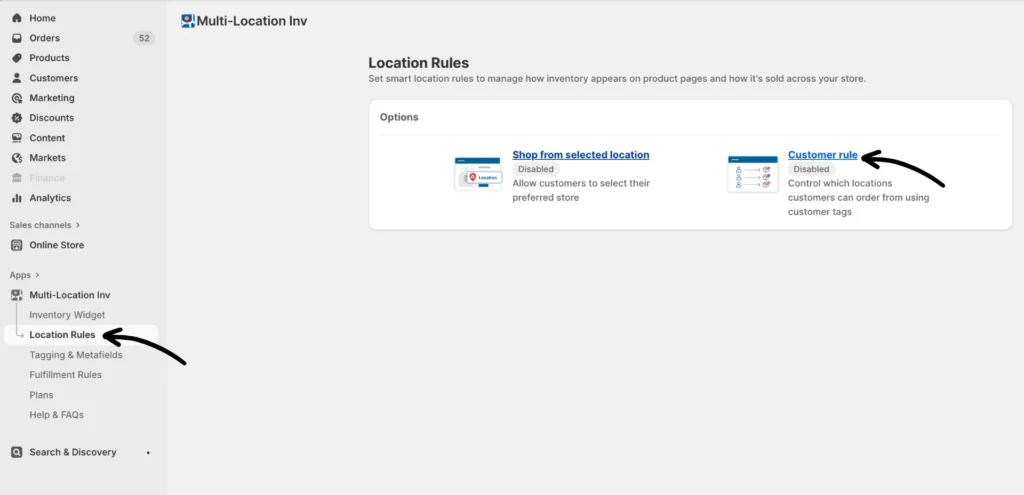
Customer rules
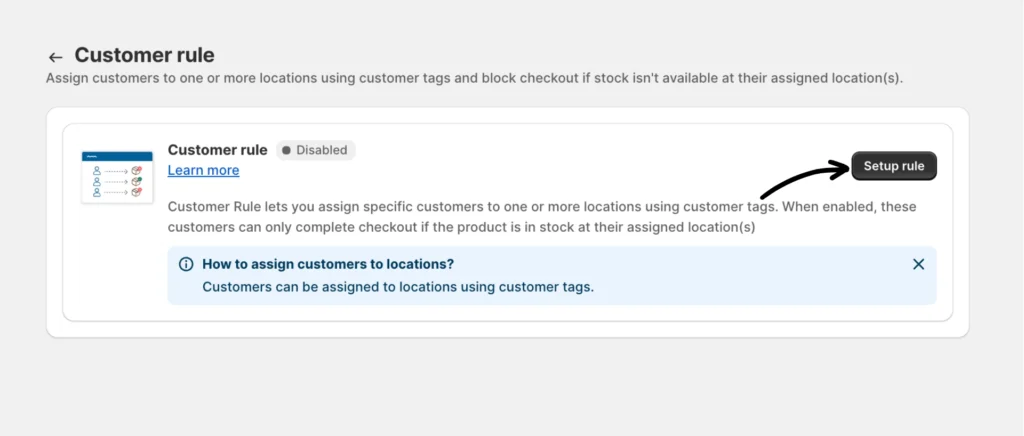
Customer Rules let you assign specific customers to one or more locations using customer tags. When enabled, these customers can only complete checkout if the product is in stock at their assigned location(s).
For example, if you want customers in the Central London and Camden areas to see only the Holborn warehouse location:
- Tag all customers from these areas with “Holborn.”
- Associate the “Holborn” tag with the Holborn store/warehouse location.
Notes
- Requires Shopify customer tags to be set on the customer profile.
- A maximum of 50 locations is supported
- Mapping updates require syncing tags into customer metafields, which may take a few minutes to complete.
- If no mapped location has stock, the customer cannot complete checkout.
Configure rule mappings
Rule setup
Step 1: In the app, go to Location Rules > Customer rule.
Step 2: Inside the Customer rule page, you’ll need to click Setup rule to start the guided setup process.
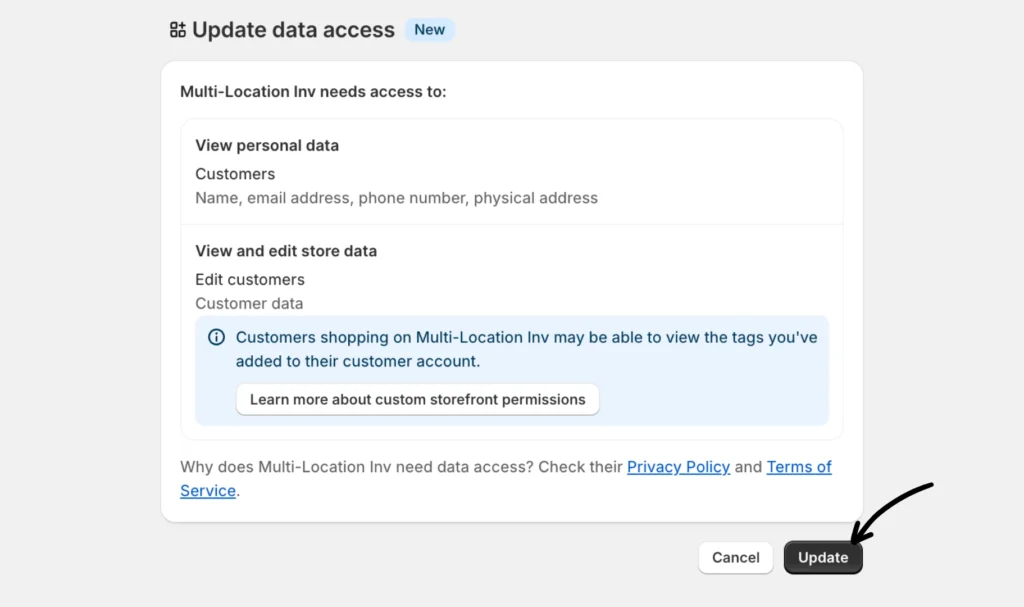
Step 3: The Customer rule requires access to customers; you will first be redirected to approve additional access needed. Click Continue when it appears.
Step 4: Next, click Update to confirm the data access permission.
Step 5: You’ll be routed back to the Customer rule page. Click Setup rule again to continue with the setup. This will open the pop-up window where you can configure your customer tag-to-location mappings.
Create a tag-to-location association
Step 1: Click Add new.
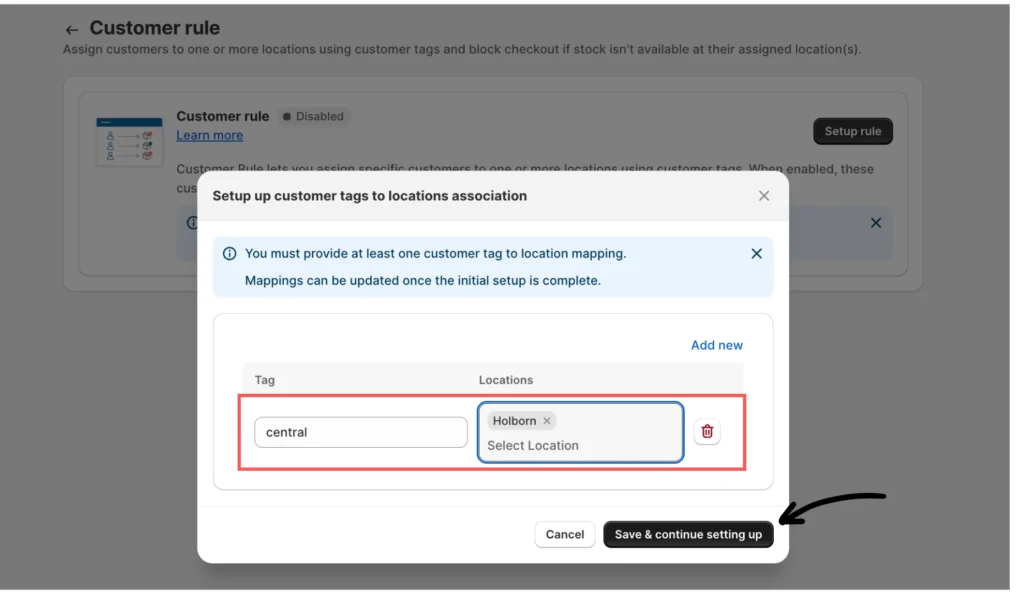
Step 2: In the Tag field, enter the customer tag and assign one or more locations that customers with it.
For example:
- Tag: central
- Location: Holborn warehouse
Step 3: Click Save & continue setting up. This will trigger the tag-to-metafield sync.
Note: Updates require syncing tags into customer metafields and may take a few minutes to complete.
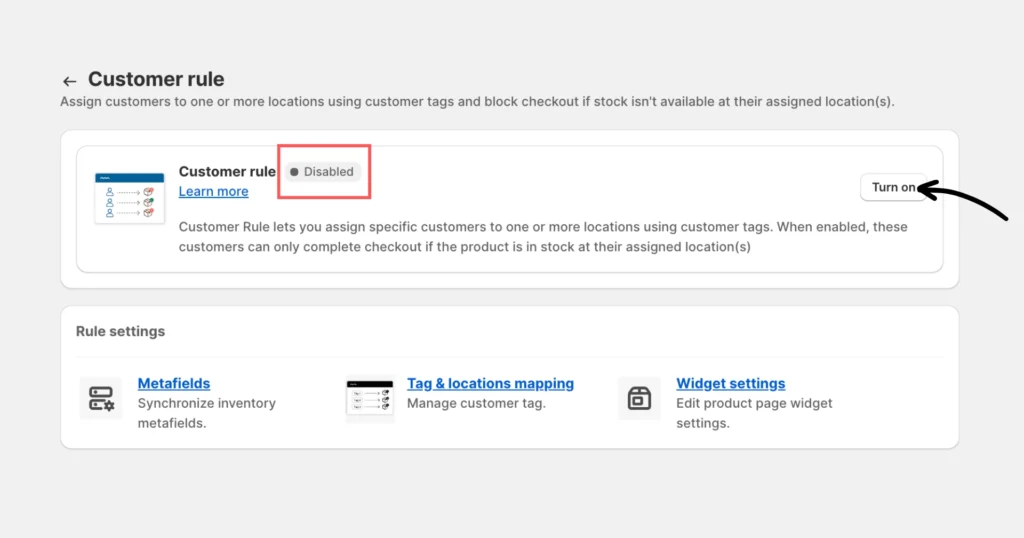
Step 4: Click Location Rules > Customer rule and ensure it is enabled. If not, click the Turn on button to enable it.
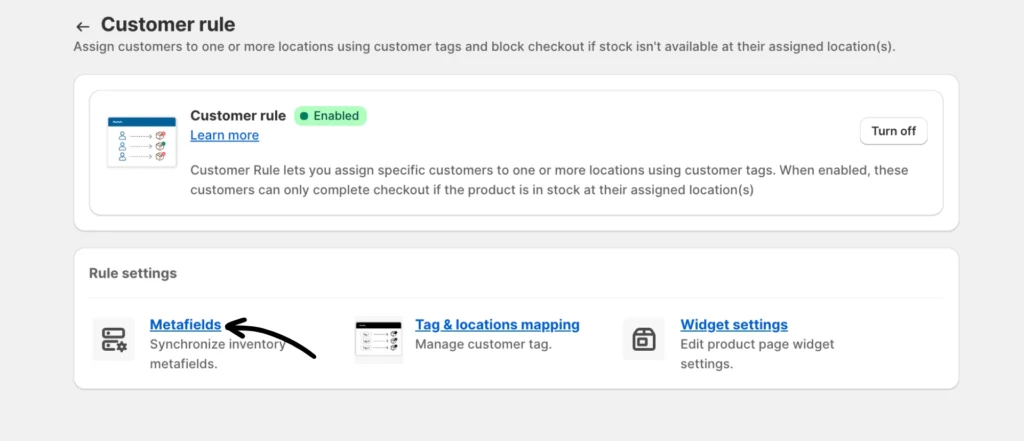
Sync metafields sync (important)
Metafields for products published to the online store are kept in sync with inventory updates using Shopify webhooks.
While webhooks typically update metafields in near real-time, occasional delays or missed events may occur due to network issues or platform limitations.
To ensure data accuracy and consistency, use the manual sync option or enable scheduled syncing (available with the Pro Plus plan).
- To sync metafields immediately, click Sync Metafields (manual sync).
- Scheduled syncing — set a daily sync hour if you prefer automated consistency.
Note:
- Please ensure daily metafield sync is set up to run during non-business hours in your timezone.
- Inventory accuracy at mapped locations is critical. Incorrect stock can cause valid purchases to be blocked.
Configure Widget settings
Go to Customer rule > Widget settings to edit product page widget settings. These settings control how the app disables checkout and what your customers see:
- Hide Buy Now button – Hide Buy Now, along with Add to Cart, for consistent behaviour
- Cart form selector – Provide if the app can’t detect your theme’s add to cart form automatically.
- Add to cart button selector – Provide if the app can’t detect your theme’s add to cart button automatically.
- Sold out text – Text shown when Add to Cart is disabled due to rules or stock. Example: Awaiting restock.
- Add to cart text – Label used when Add to Cart is enabled. Example: Add to Basket.
- Text element selector – If the Add to Cart button’s text is wrapped in an HTML element, enter the selector. Example:#AddToCartText.
- Additional Info Message – Message displayed under the widget when a purchase is blocked. Example: Item will be available soon.
Display specific locations based on customer tags
To display specific locations based on customer tags, follow this example :
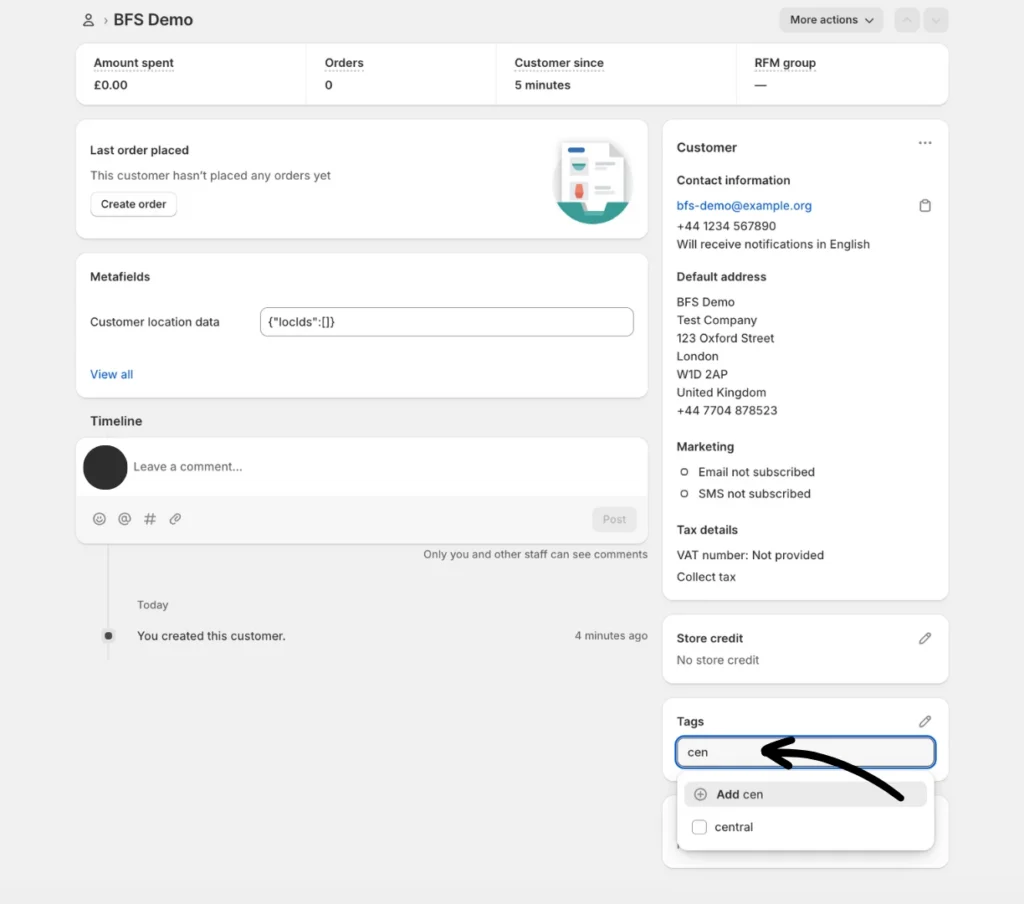
Step 1: Go to Shopify’s Customers section and open a customer’s details page to add a tag for customers.
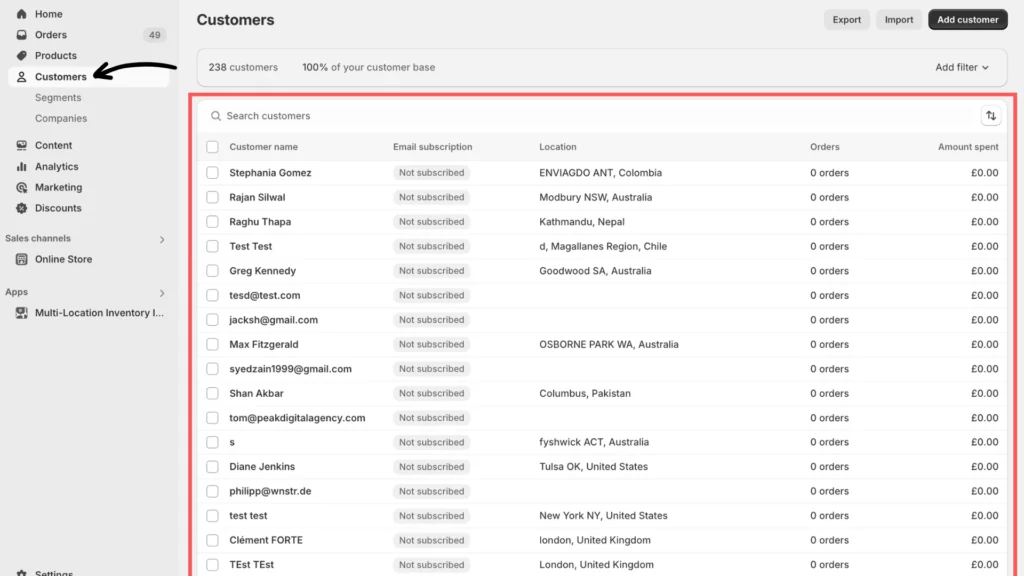
Step 2: Add the tag to the customer from the customer details page and click Save.
Ensure the option to output customer info is enabled in the app embed.
1. Navigate to Online Store > Themes > Customize > App Embeds.
2. From Location Inventory, enable the option “Output Customer info.”
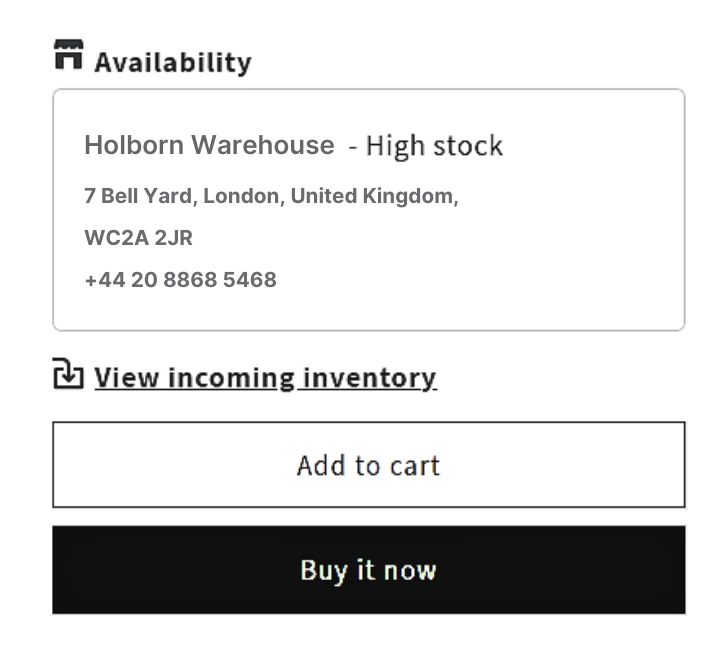
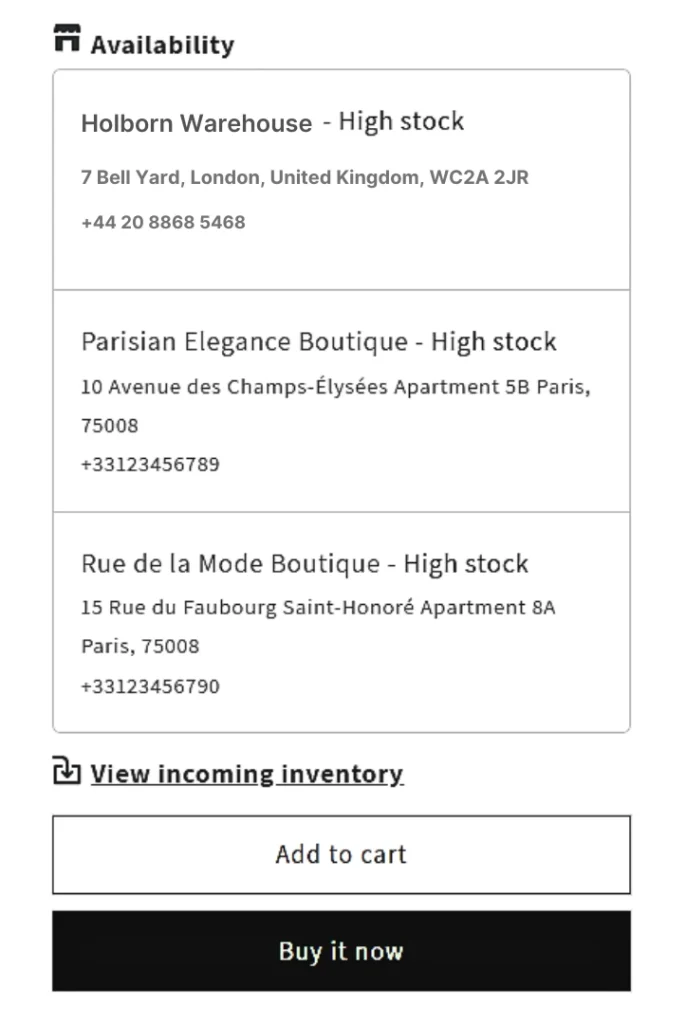
The restriction applies when adding to the cart. If stock is unavailable at the mapped location, customers will see an error message on the product page when they click Add to Cart.
Storefront preview before adding customer rules:

Storefront preview after adding customer rules:
If you encounter any issues, don’t hesitate to contact the app’s support team for further assistance.