
Create Google Maps API key
You must provide a Google Map API key for the Geolocation search feature to work. This article will guide you on creating a free key on the Google Cloud Console.
Create an API key
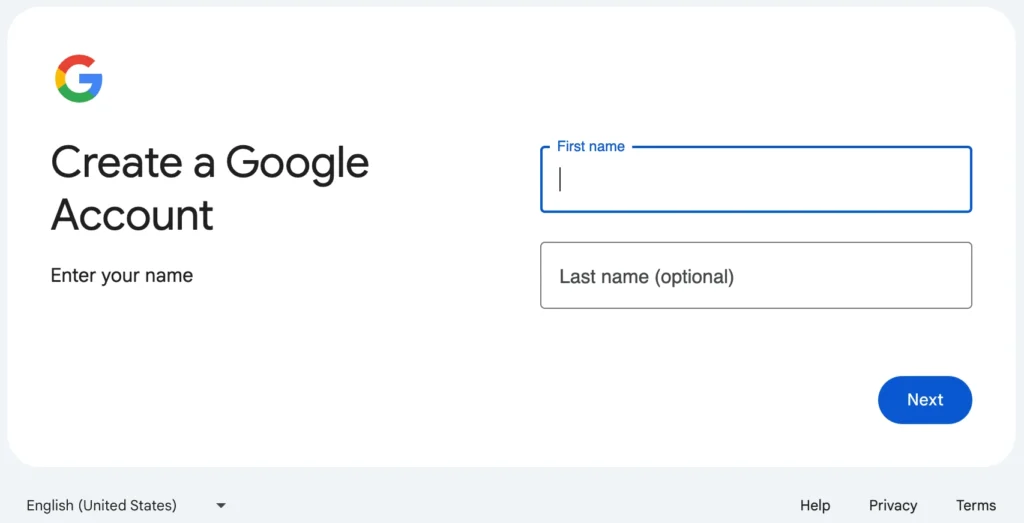
Step 1: Create a Google account if you don’t have one.
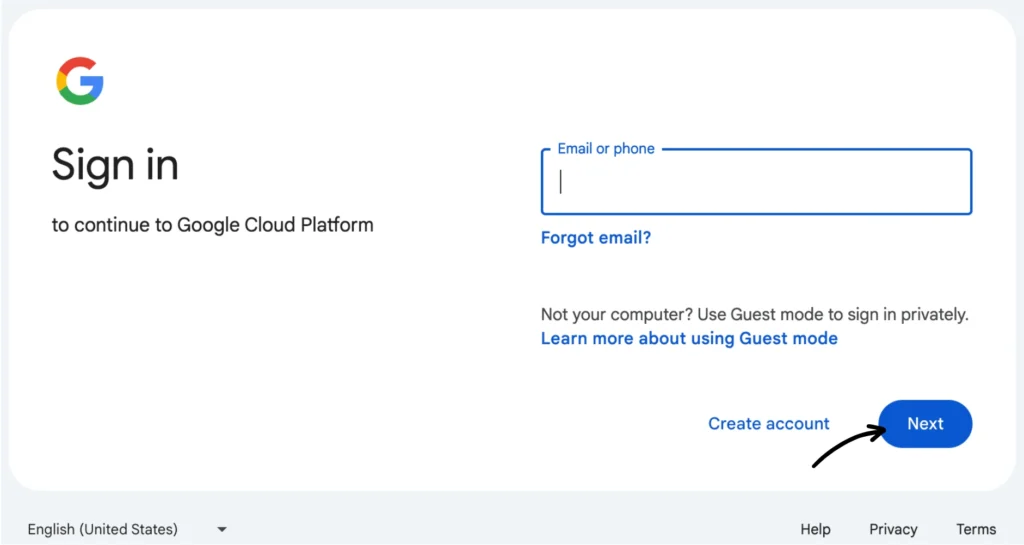
Step 2: Use your Google account to log in to the Google Cloud Console (GCC).
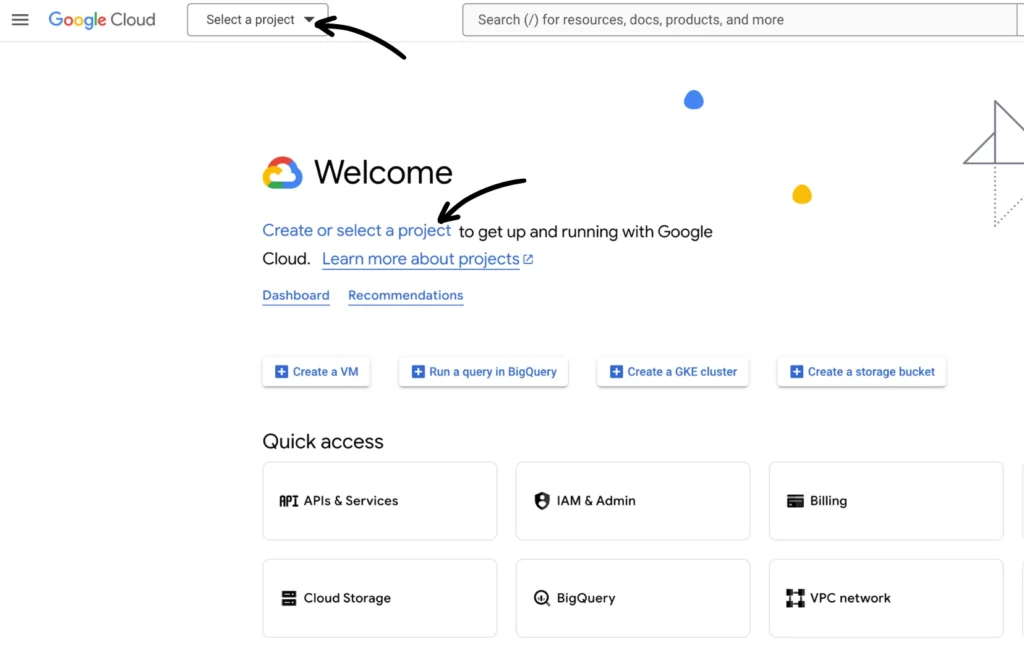
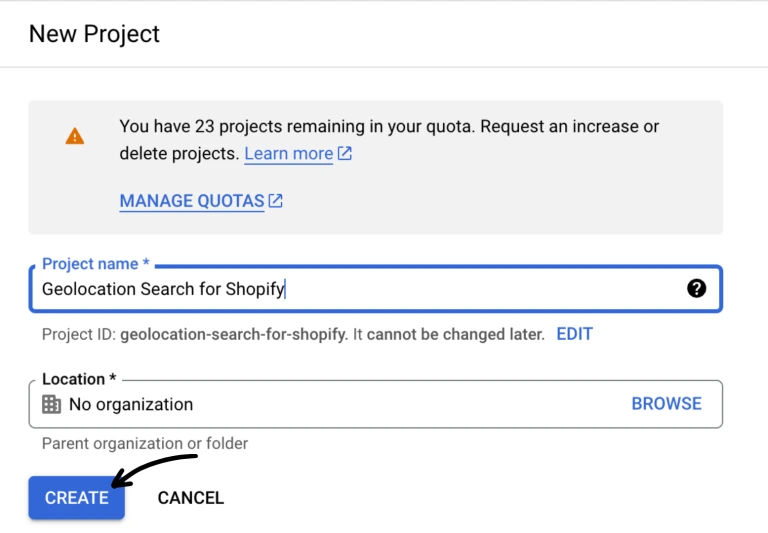
Step 3: Create a new project in your GCC dashboard or select an existing one (see the screenshots below).
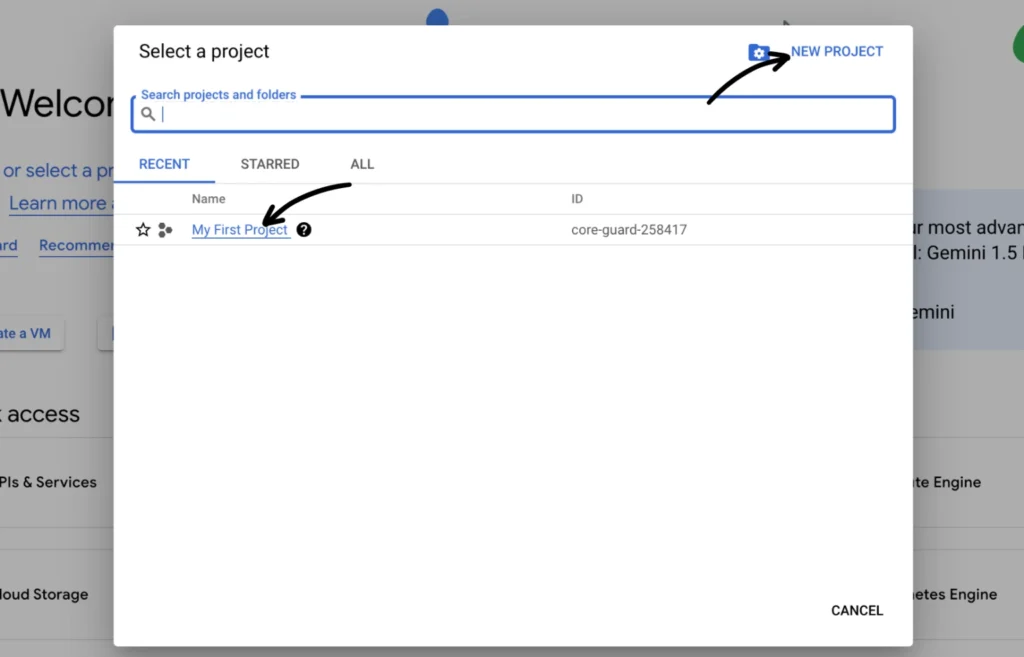
Step 4: Give your project a name (like something related to the one you’ll be using it for). For now, you can leave the Location field as-is.
Click Create once you have named your project.
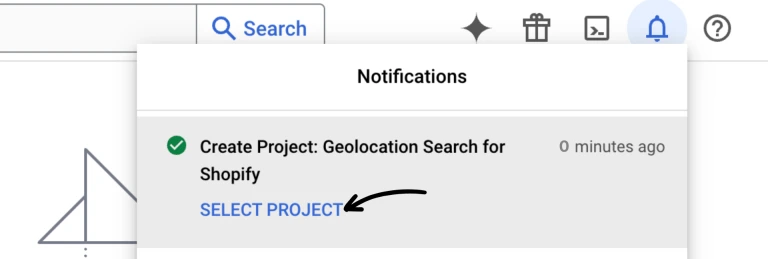
Step 5: Select the project from the Notifications panel or go back to your dashboard to select it, just like in Step 3.
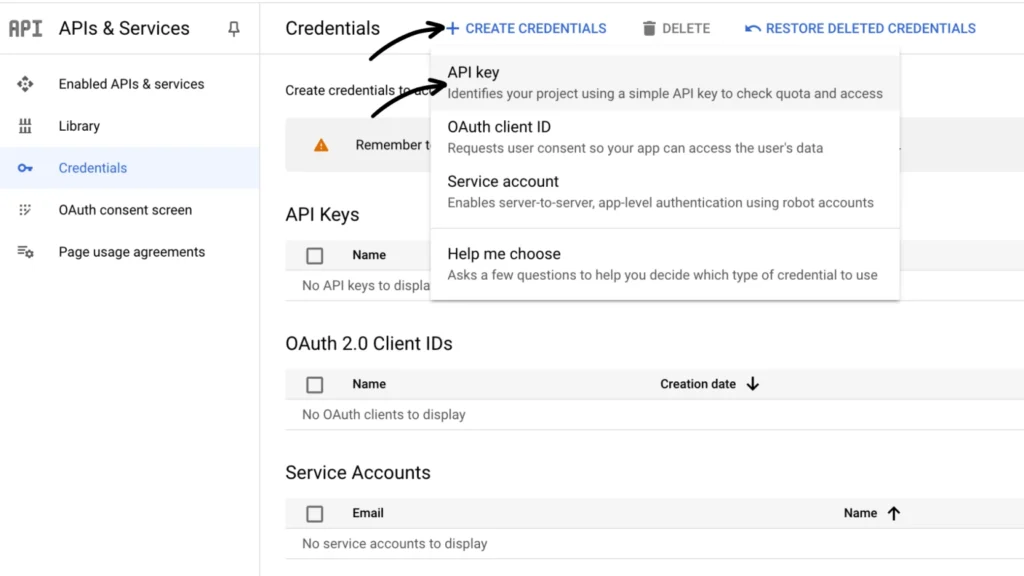
Step 6: Create the Maps API key. On the API Credentials page, click + CREATE CREDENTIALS > API key.
Create an API key
Your API key is now created. You can close the pop-up window for now.
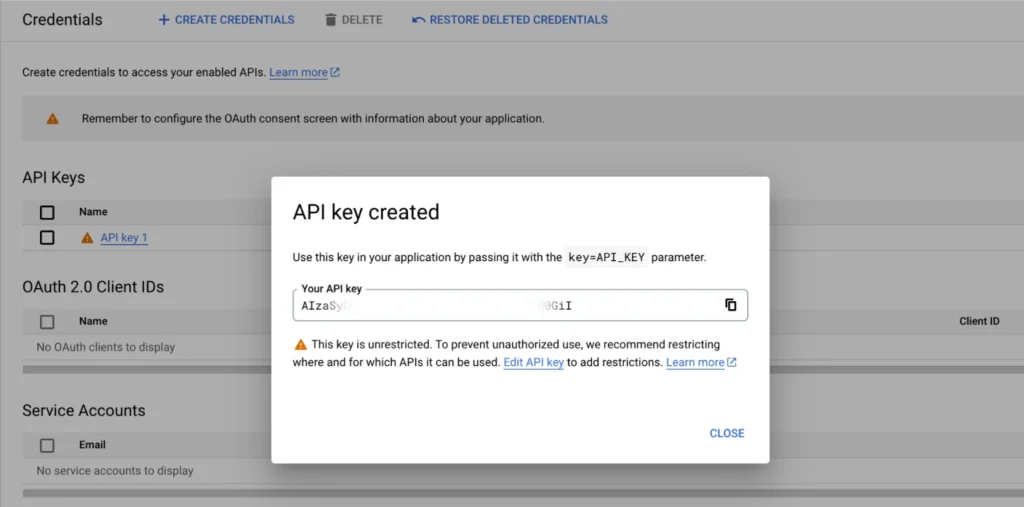
Note: Please ensure that this API key has access to the following and is restricted to your site domain: Maps Javascript API, Distance Matrix API, Places API, and Geocoding API (needed for the automatic location searching feature)
Follow the steps below for guidance.
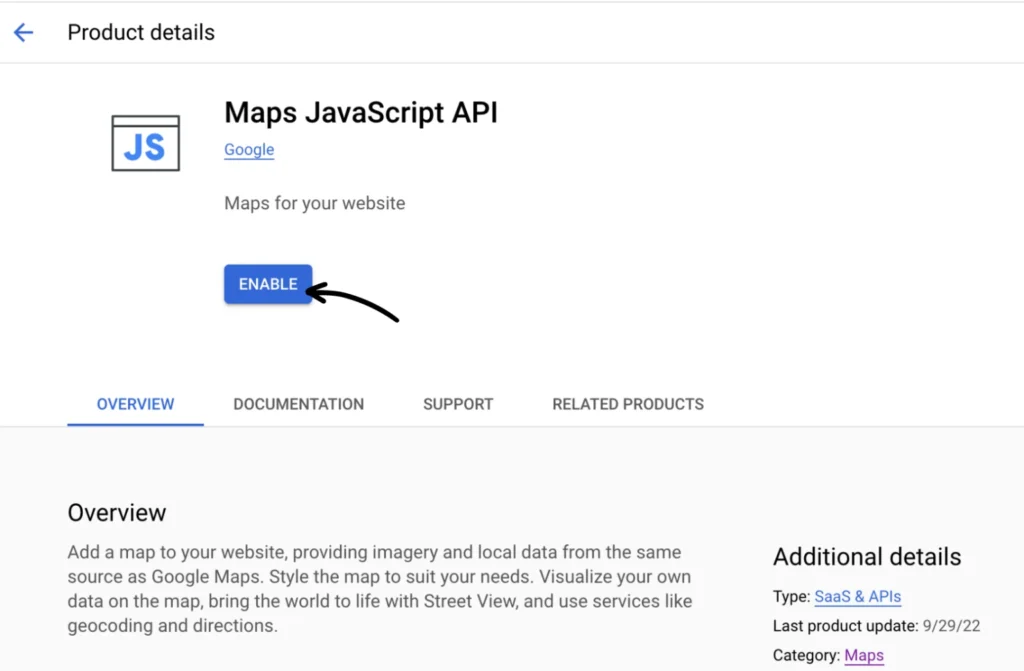
Enable the required APIs and services
On the Maps API library, please search and enable the following:
- Maps Javascript API
- Distance Matrix API*
- Places API* [DO NOT use “Places API (New)”]
- Geocoding API
* As of March 1, 2025, the Distance Matrix API and Places API have been discontinued (moved to Legacy status). You can no longer search these APIs. Instead, access these two APIs directly by clicking the links below:
Once all required APIs are enabled, return to your API Credentials page and restrict your API key.
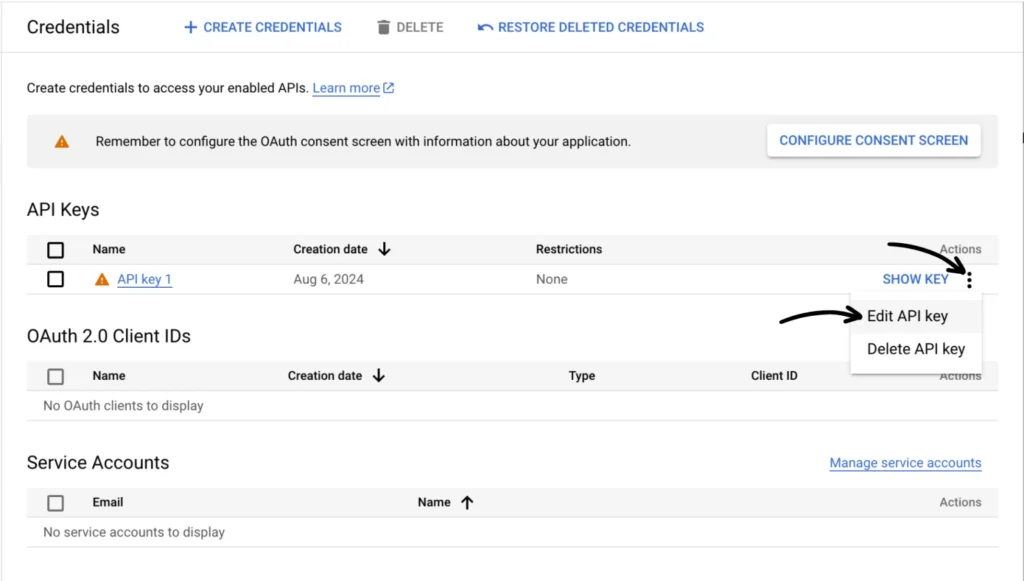
Restrict your API key
From the API Credentials section, click the three-dot menu of your newly created API key and then select Edit API key.
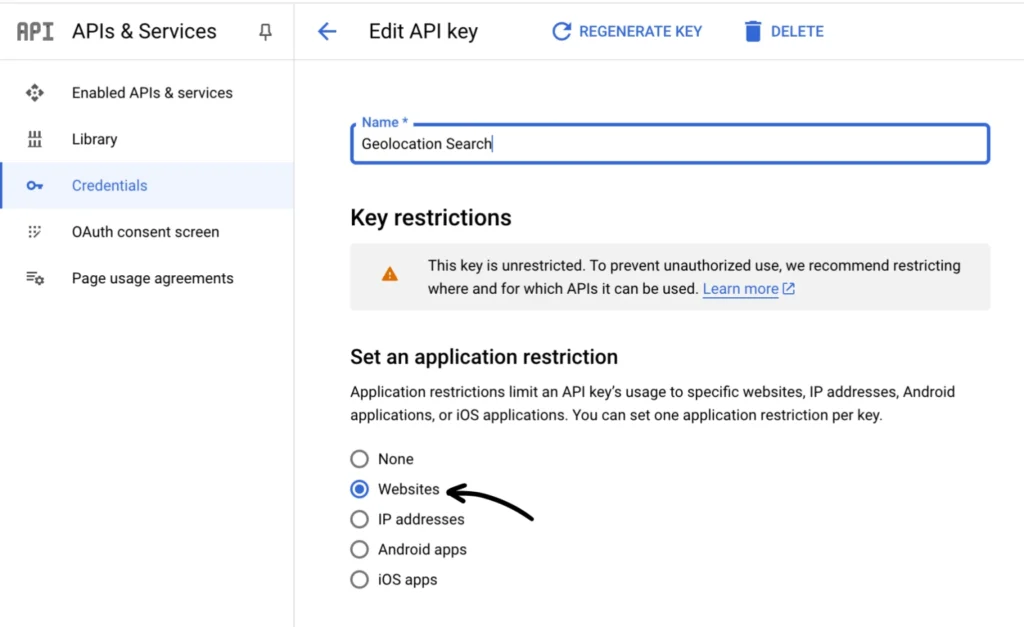
Under “Set an application restriction” choose Website.
Under “Website restrictions”, click the + Add button to enter your website address (for example “https://MyStore.com”) and also add your myshopify.com address. Under “API restrictions”, select Restrict key and choose the three APIs enabled earlier.
See the image below for reference.
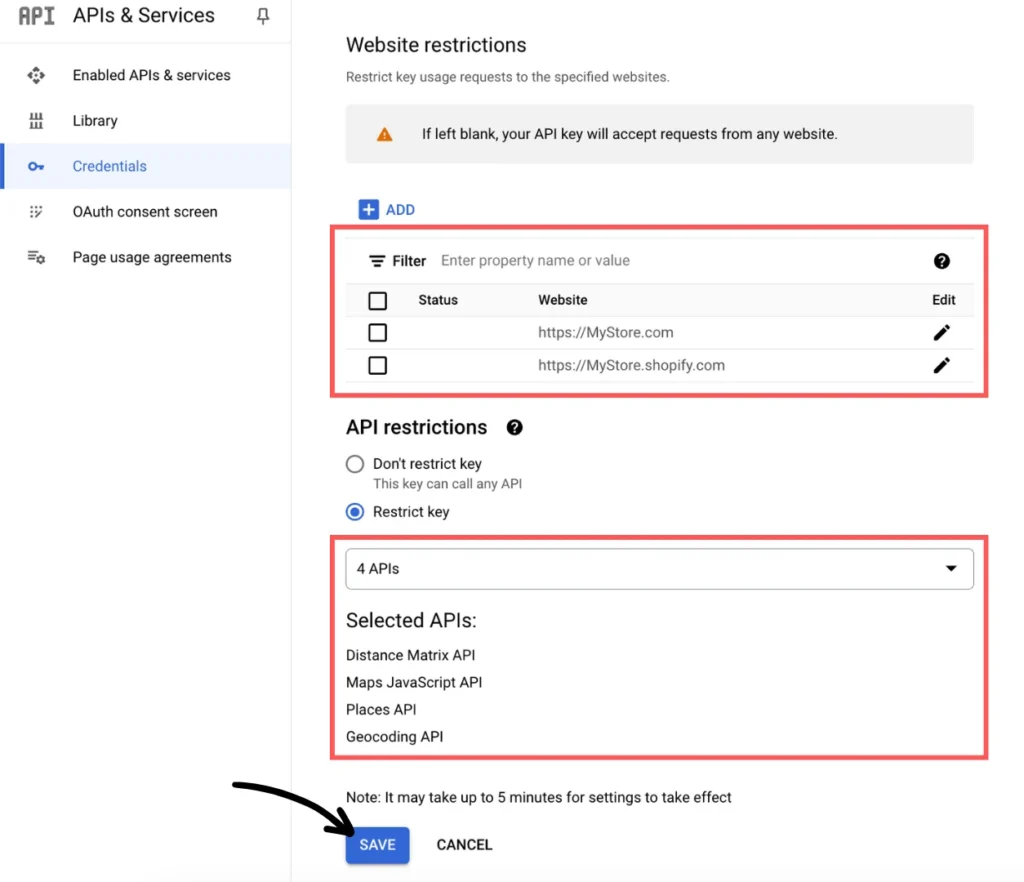
Once all the settings are in place, don’t forget to click Save. Please note that it might take up to five (5) minutes for these changes to take effect.
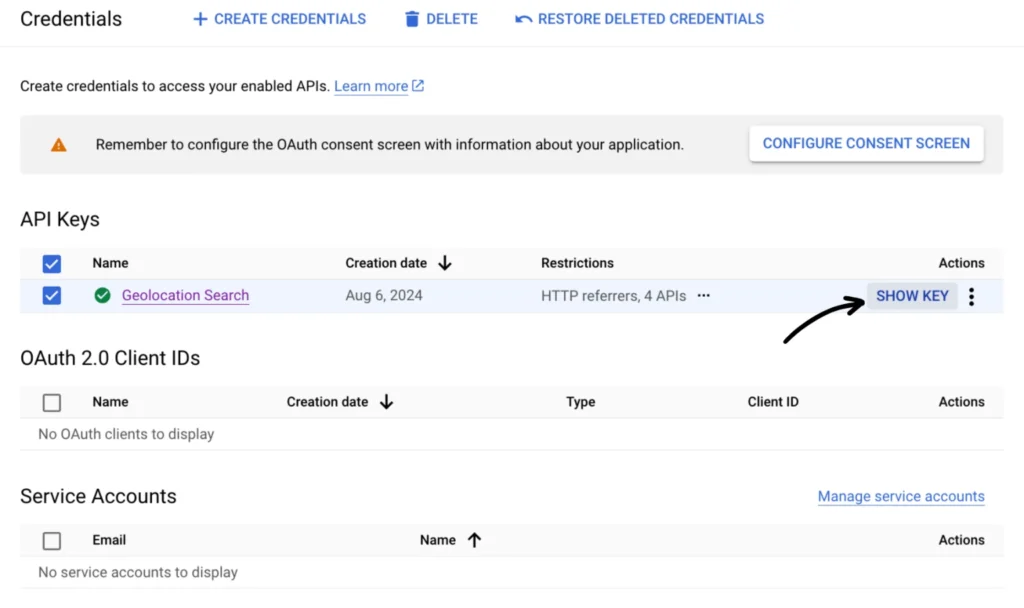
Go to the API Credentials page and click SHOW KEY under API Keys to copy your API key.
If you need help with these instructions, you may contact our app support team.